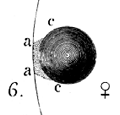
A Venus Transit Effect
Photoshop Simulation of the Black Drop
 Along with my kids and my
father-in-law, I watched the June 8, 2004 transit of Venus from the parking lot
of my daughter's middle school, a location with a good view of the eastern
horizon. One of the things I looked for, but didn't really see, was the black
drop effect, a distortion of the planet's silhouette as it gets close to the
edge of the Sun's disk. During previous transits, this effect had frustrated
attempts to precisely measure the scale of the solar system.
Prior to June 8, no one now alive had seen a Venus transit, so there was some uncertainty about the cause of the black drop effect. Afterward, that situation hadn't changed much, because most people didn't see the effect this time around. The following Photoshop simulation, suggested by a discussion on the astronomy newsgroups soon after the transit, supports a fairly simple explanation.
 Original image
 Gaussian blur, radius 12.5
 Contrast +75, Gamma 0.5
 Animated
The blur spreads out the edges of both Venus and the Sun. The contrast stretch and gamma shift together hide most of the blur, giving the illusion of adequate resolution, except where the blurred edges overlap. In the overlap, a ligament forms, drawing Venus into a teardrop shape. Note that this isn't a subtle effect that depends crucially on image scale, point spread function, or limb darkening. I got this out of a simple image processing experiment almost without trying.
Relating this to physical effects, the Gaussian filter simulates a point spread function (PSF), the gamma simulates the non-linear response of a sensor, and the contrast adjustment simulates a sensor with inadequate dynamic range. It appears that the PSF and basic components of sensor response can account for the black drop effect. I'd expect limb darkening to make a contribution too, but I didn't need to explicitly simulate it in order to see the effect.
Blur (broadening of the PSF) can be caused by a number of things, including Earth's atmosphere (bad seeing), Venus's atmosphere, diffraction in the optics (including the eye), and simple bad focus. All of these have been proposed as causes of the black drop, but none of them are necessary by themselves. Schneider, Pasachoff and Golub found a black drop effect in images of the 1999 Mercury transit taken by an Earth-orbiting satellite, so it shows up even without the interference of the atmospheres of either the Earth or the transiting planet.
The contrast effect arises from the brightness of the Sun. Photographers know that it's hard to photograph someone who's backlit by the Sun. It's not just that the subject's face is in shadow, because they're still more brightly lit than they would be by indoor lighting at night. The problem is the range of brightness. In such scenes, all the lighter grays disappear into the glaring white, while the darks merge with black. This is why, when simulating the black drop with your thumb and forefinger, it works best to hold your hand in front of a bright light.
On the morning of the 2004 transit, I brought my 8-inch f/6 Celestron Dob and my f/7 TV85 refractor to the middle school. I used a Thousand Oaks glass filter on the Dob and Baader film on the TV85. I'd stayed up late the night before making the TV85 filter cell out of posterboard, and it was worth the effort. The TV85 and Baader film produced views with much better detail and contrast.
For 2012, I brought the TV85 and my Orion XT10i to work, but my coworkers and I were clouded out in the most perverse way possible. Overcast skies began to break just as the transit started, until large parts of the sky were clear, everywhere except the Sun. A small band of cloud continued to shroud the Sun until both had disappeared over the horizon.
A previous version of this page included a technical explanation of the image processing operations. I've moved it here to make the rest of the page a little friendlier. Wikipedia has pretty good articles on both Gaussian blur and gamma correction.
The contrast adjustment performs a scale operation on the intensities. In Photoshop,
i' = ( 1 / ( 1 - c )) ( i - a ) + a
where i is the intensity in the range [0, 1], a is
the average intensity of the image, and c is the contrast setting
divided by 100, so that it's in the range [-1, 1). When contrast is increased,
intensities less than a get smaller and those greater than
a get bigger, and anything that falls off the ends is clamped to 0
or 1. (Note that this describes what Adobe now calls Legacy
contrast
adjustment. The newer contrast slider is more subtle.)
The gamma adjustment raises the pixel intensity to a power, making the mapping from intensity number to pixel brightness non-linear. On the Adjust Levels dialog in Photoshop, where you set the gamma, you can also scale the intensities by setting the black and white points (the first and third numbers). With suitable choices for these numbers, the effect is exactly equivalent to legacy contrast adjustment.
