The Ring Nebula
As Seen by Different Instruments
This was the first deep sky object I looked for in my telescope, in the summer of 1997. I'd seen a small picture of it in a book I bought when I was 9 or 10, Donald Menzel's Field Guide to the Stars and Planets, and I used the same book 25 years later to find the real thing for the first time. (Move your mouse over the first two images to see constellation outlines.)
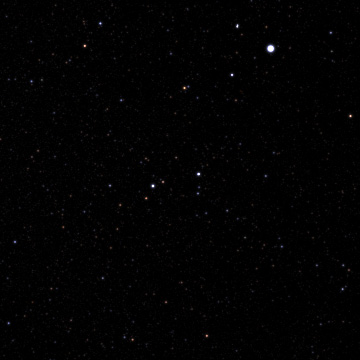
Part of the night sky (15° FOV) centered on M57.
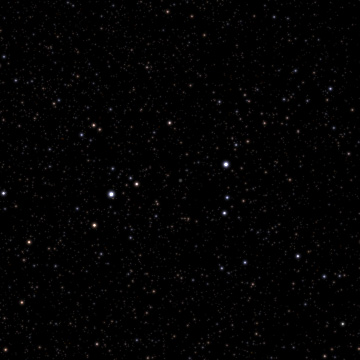
The view through binoculars (6°).
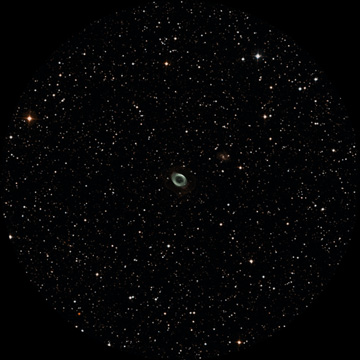
An amateur telescope view (0.5°, or 30').
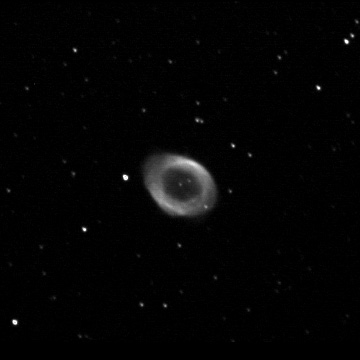
Image through a 20-inch Mak-Cass (6').
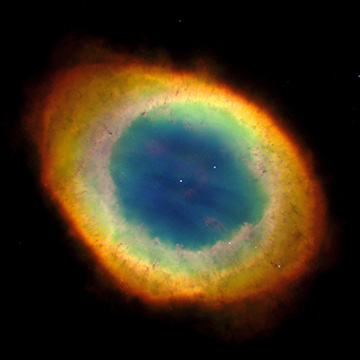
Hubble Space Telescope (1.5').
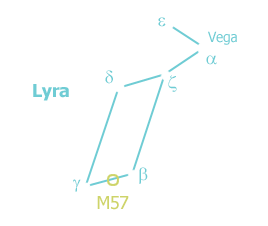
Messier object 57, the Ring Nebula, is in the constellation Lyra, high in the northern hemisphere sky during July and August. Look straight up for Vega, the fifth-brightest star overall and the second-brightest in the northern summer sky, and near it you should find a parallelogram, or crooked rectangle. M57 lies between Beta and Gamma Lyrae, the corners farthest from Vega.
The field of view in 10 × 50 binoculars is about 6 degrees. The image is magnified by a factor of 10, and the objective lenses (the ones on the front) are 50 mm in diameter. In the dark, the pupils of your eyes open to a maximum width of about 7 mm, so the 10 × 50s have roughly 7 times the aperture, or about 50 times the light-gathering area.
Binoculars easily reveal that Epsilon Lyrae is more than one star. But centering the view between Beta and Gamma, where M57 lies, you probably won't see the ring. Under ideal conditions, it looks like a dim, slightly blurry star. It's easy to miss unless you know exactly what you're looking for, and in typically light-polluted backyards, it might not be visible at all. You'll need more aperture and higher magnification to see the ring structure.
Looking through a telescope on a dark night, we can finally see what my family has called the smoke ring or the celestial Cheerio. Using a 20mm Plössl eyepiece in a typical 6- to 10-inch Dobsonian, the field of view is about half a degree, the size of the full Moon, and the image is magnified by a factor of 60. The mirror in this class of scope gathers from 500 to 1300 times as much light as the unaided eye.
An eyepiece with a shorter focal length would increase the magnification. But the atmosphere, the imperfections of the telescope, and the wave nature of light all place practical limits on the amount of useful magnification we can get. Beyond a certain point, the image just gets blurrier. The maximum can vary widely. For me it's typically around 200x.
During a 1999 visit to the Vega-Bray Observatory in southern Arizona, I had my first experience with CCD imaging using their 20-inch f/10 Maksutov Cassegrain telescope. The image I made really doesn't do justice to the view at the eyepiece. I felt like I was falling into the ring. I could easily see the central star, which is a million times fainter than Vega, and for someone accustomed to more modest equipment, the ring itself seemed too bright to be real.
The Hubble Space Telescope uses a 94-inch f/24 primary mirror. M57 doesn't quite fit in the L-shaped 2.5 arcminute field of the Wide Field / Planetary Camera 2, so this image was assembled from exposures taken during two separate telescope pointings.
Hubble's mirror is pretty big, even by the standards of ground-based professional observatories, but its real advantage is that it's 400 miles above the blur, distortion and light pollution of the air we have to look through on the ground.
About the Images
All of the images are centered on M57 (J2000 18h53.6m +33°2ʹ) and oriented the same way. The first two are purely artistic renderings of naked eye and binocular views, made with my star plotting code. The medium-size telescope view is a composite of Sloan Digital Sky Survey (SDSS-2) plates and my CCD image. I combined red and blue SDSS-2 plates obtained from NASA/GSFC's SkyView virtual observatory, made minor color adjustments, and superimposed my own image of the nebula, since the nebula in the SDSS image is overexposed.
The fourth image is a CCD photograph taken the night of July 7-8, 1999 at Vega-Bray through their 20-inch Mak. Since monsoon season had just begun in southern Arizona, we had to wait until after midnight for the sky to partially clear. The camera was an Apogee AP2 with a 1536 x 1024 Kodak KAF-1600 chip. It was controlled by version 4.05 of Axiom Research's (now Mirametrics) MIRA Pro image processing and analysis software. This was a 40-second exposure with 3 × 3 binning and a gain of 32 electrons per count.
The Hubble image was taken by the HST WFPC2 on October 16, 1998 and released to the public January 6, 1999. See the press release, or just peruse the Hubble Heritage Program gallery. This instrument was installed in the HST by STS-61 in 1993 and replaced in 2009. The WFPC2 Handbook was the technical reference used by astronomers to plan observing sessions with this instrument. I rotated the image so that it would match the orientation of the others.
The color HST image is a composite of exposures taken through three filters, each of which only lets in the light of a single emission line from a specific ionized molecule. The image from each filter is assigned to the RGB color channel nearest the wavelength it passes.
| 658nm [N II] | 501nm [O III] | 469nm He II |
To see the component filter images, load the color image into a program like Photoshop and look at the color channels separately. The filter wavelengths aren't too far from those of traditional RGB color primaries.
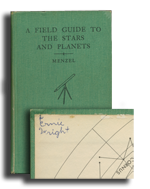 The Menzel book (left, with my third-grader cursive signature) was also with me
as I tried to find Halley's Comet while sitting on a cold pre-dawn beach in the
early Spring of 1986, a decade before I got serious about stargazing. A scrap of
newspaper, a map of the comet's location torn from the Washington
Post, is still tucked inside the book's back cover.
I no longer bring Menzel into the field, since its binding has become somewhat fragile. The current edition, edited by Jay Pasachoff, is still a nice book, but it lacks the, to me, inspirational photographic charts of the 1964 edition.
